It is nearly impossible to build a complex OpenSCAD hierarchy without working with children. Children are very useful when it goes about aligning children in the “mother” part. There are however several things, which are missing. For example, look at this spindle holder:
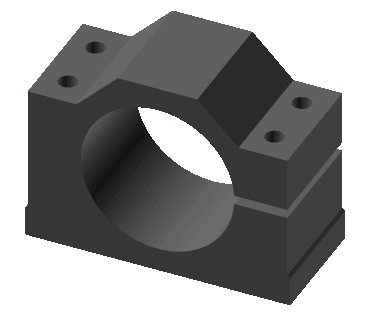
It has several mounting holes and a bracket for a spindle motor, so when you mount it on some surface you will need the following:
- Create mounting holes in the surface
- Align the spindle with the bracket and all screws with their mounting holes
Here is how I do it. First, think about all possible use cases and child elements. For example, for this holder we definitely need a possibility to align the spindle and 4 screws. Let’s define children as following:
children(0)must be spindlechildren(1),children(2),children(3)andchildren(4)are screws;
In the code it looks like this:
/* Spindle holder assembly (holder+spindle+screws) */
module spindle_holder_assembly()
{
    /* Spindle holder itself */
    spindle_holder();

    /* Spindle */
    translate([
        0,
        -spindle_holder_y/2,
        spindle_holder_spindle_offset])
    children(0);

    /* Screw 1 */
    translate([
        spindle_holder_hole_dist_x/2,
        spindle_holder_hole_dist_y/2,
        spindle_holder_hole_z])
    children(1);

    /* Screw 2 */
    translate([
        -spindle_holder_hole_dist_x/2,
        spindle_holder_hole_dist_y/2,
        spindle_holder_hole_z])
    children(2);

    /* Screw 3 */
    translate([
        spindle_holder_hole_dist_x/2,
        -spindle_holder_hole_dist_y/2,
        spindle_holder_hole_z])
    children(3);

    /* Screw 4 */
    translate([
        -spindle_holder_hole_dist_x/2,
        -spindle_holder_hole_dist_y/2,
        spindle_holder_hole_z])
    children(4);
}
And here is how to use it:
spindle_holder_assembly($fn=100)
{
    /* children(0) */
    spindle();
    /* children 1 to 4 */
    mx_screw_lens_hex(6,75);
    mx_screw_lens_hex(6,75);
    /* Some children can be replaced */
    /* with an empty object */
    group(){};
    group(){};
}
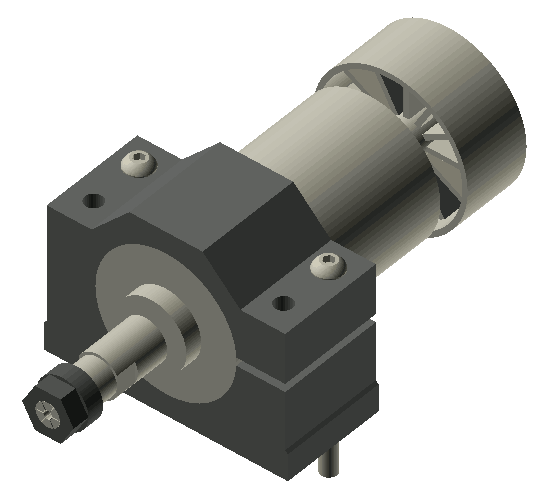
In 3D it looks like this:
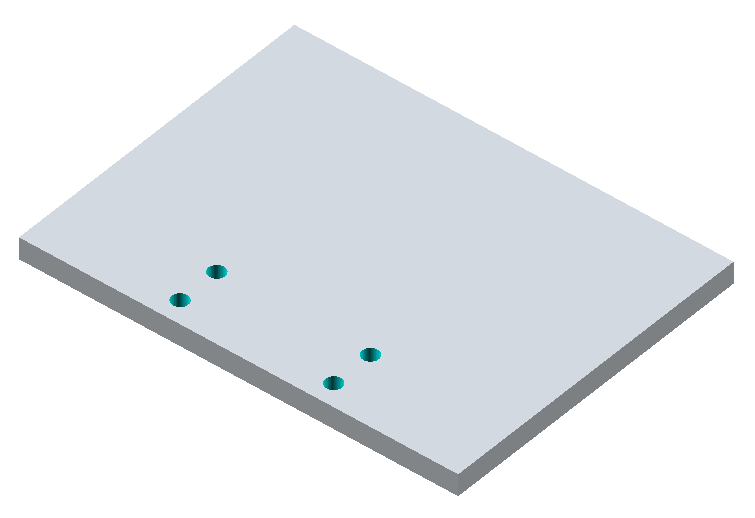
One more thing I like: you can do whatever you want to do with children. For example, the only possible children for the base plate would be mounting holes and there can be many of them, so you don’t know in advance how many elements you would need. In the code it might look like this:
/* Base plate has only holes */
module base_plate(width,length,height)
{
    difference()
    {
        /* The base plate itself */
        color(color_alu)
        cube([width,length,height]);

        /* The exact number of holes is unknown */
        if ($children > 0)
        {
            for (i = [0:$children-1])
            {
                children(i);
            }
        }
    }
}
And here is how to use it:
/* Base plate dimensions */
base_w = 200;
base_l = 150;
base_h = 10;

base_plate(base_w, base_l, base_h)
{
    translate([base_w/2,spindle_holder_y/2,base_h])
    spindle_holder_plate_holes(7.5,base_h);
}
Here is how it looks in 3D:
You can download the zip with all the source code for this article here and try to play with the hierarchy. I use this approach for my CNC_OpenSCAD project and it helps me to keep the model easy to understand and to modify.